Matt555
iMod
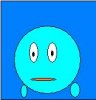
This tutorial will help you to create a smiley like the ones I make.
This tutorial is for a basic smiley, to create more advanced shapes takes imagination and patience.
Open a new document with these settings:
Width: 150 Pixels
Height: 150 Pixels
Resolution: 72 Pixels/Inch
Colour Mode: RGB Color 8-Bit
Background Contents: Transparent
Create a background for your smiley, a gradient usually works well. Use colours similar to the ones found in your smiley. For mine I've used the foreground colour #007EFF and the background colour #0030CA
Drag a verticle gradient (hold shift while doing this) for your background.

Next create a new layer (CTRL+Shift+N) and name it 'Circle'. Next choose the colour of your smiley, a slight gradient will be used here. I have chosen a foreground colour of #56AAFF and a background colour of #176DFC.
Using the Elliptical Marquee Tool drag a circle out on this layer, to make it perfectally circular just hold shift while dragging. Now use the gradient tool to create a gradient for your smiley, I have done mine at a very slight angle.

Now we are going to add an outline to the circle, go to Layer>Layer Style>Stroke and use these settings:
Size: 4 px
Position: Outside
Blend Mode: Normal
Opacity: 100%
Fill Type: Colour
Color: #000000
Now for the eyes, create a new layer named 'Eye' and using the Elliptical Marquee tool drag an oval shape inside the circle created on the layer below.
Using white (#FFFFFF) and the paint bucket tool fill this selection with the foreground colour. Now hear to Layer>Layer Style>Stroke again and use these settings:
Size: 3 px
Position: Center
Blend Mode: Normal
Opacity: 100%
Fill Type: Colour
Color: #000000
Now simply duplicate this layer (CTRL+J) and position it next to the previous layer.

Now for the pupils, create a new layer named 'Pupil' and use the Elliptical Marquee Tool to create a new selection inside the Eye area. Use the paint bucket tool and fill this with black (#000000).
Duplicate the layer and place this layer inside the other eye shape.
Create a new layer named 'Mouth' and using the Elliptical Marque Tool create a shape like the one below near the bottom of the smiley area.

The set the Elliptical Marquee Tool as 'Subtract from Selection' (located at top left of PS window)

Drag a selection that will subtract an area from your previous selection and leave you with a selected shape like the one below.

Now using the paint bucket tool fill that selection with black.

Now create a new layer named 'Hand'.
Using the selection tool drag out a small circle near the bottom left of your smiley. Use the gradient tool and your original smiley circle layer colours to make a gradient for this selection. Now go to Layer>Layer Style> Stroke and use these settings.
Size: 3 px
Position: Center
Blend Mode: Normal
Opacity: 100%
Fill Type: Colour
Color: #000000
Now duplicate this layer and place on the other side of the smiley's body. You are now finished.

I hope you have fun making your smileys - maybe show us your creations! (I will post user submitted smileys on my site for display as well if you want)
(Tutorial also located here.)
This tutorial is for a basic smiley, to create more advanced shapes takes imagination and patience.
Open a new document with these settings:
Width: 150 Pixels
Height: 150 Pixels
Resolution: 72 Pixels/Inch
Colour Mode: RGB Color 8-Bit
Background Contents: Transparent
Create a background for your smiley, a gradient usually works well. Use colours similar to the ones found in your smiley. For mine I've used the foreground colour #007EFF and the background colour #0030CA
Drag a verticle gradient (hold shift while doing this) for your background.
Next create a new layer (CTRL+Shift+N) and name it 'Circle'. Next choose the colour of your smiley, a slight gradient will be used here. I have chosen a foreground colour of #56AAFF and a background colour of #176DFC.
Using the Elliptical Marquee Tool drag a circle out on this layer, to make it perfectally circular just hold shift while dragging. Now use the gradient tool to create a gradient for your smiley, I have done mine at a very slight angle.
Now we are going to add an outline to the circle, go to Layer>Layer Style>Stroke and use these settings:
Size: 4 px
Position: Outside
Blend Mode: Normal
Opacity: 100%
Fill Type: Colour
Color: #000000
Now for the eyes, create a new layer named 'Eye' and using the Elliptical Marquee tool drag an oval shape inside the circle created on the layer below.
Using white (#FFFFFF) and the paint bucket tool fill this selection with the foreground colour. Now hear to Layer>Layer Style>Stroke again and use these settings:
Size: 3 px
Position: Center
Blend Mode: Normal
Opacity: 100%
Fill Type: Colour
Color: #000000
Now simply duplicate this layer (CTRL+J) and position it next to the previous layer.
Now for the pupils, create a new layer named 'Pupil' and use the Elliptical Marquee Tool to create a new selection inside the Eye area. Use the paint bucket tool and fill this with black (#000000).
Duplicate the layer and place this layer inside the other eye shape.
Create a new layer named 'Mouth' and using the Elliptical Marque Tool create a shape like the one below near the bottom of the smiley area.
The set the Elliptical Marquee Tool as 'Subtract from Selection' (located at top left of PS window)
Drag a selection that will subtract an area from your previous selection and leave you with a selected shape like the one below.
Now using the paint bucket tool fill that selection with black.
Now create a new layer named 'Hand'.
Using the selection tool drag out a small circle near the bottom left of your smiley. Use the gradient tool and your original smiley circle layer colours to make a gradient for this selection. Now go to Layer>Layer Style> Stroke and use these settings.
Size: 3 px
Position: Center
Blend Mode: Normal
Opacity: 100%
Fill Type: Colour
Color: #000000
Now duplicate this layer and place on the other side of the smiley's body. You are now finished.
I hope you have fun making your smileys - maybe show us your creations! (I will post user submitted smileys on my site for display as well if you want)
(Tutorial also located here.)